Saturday, July 27, 2013
Decorate photos with Photoshop
You want to put your photo or image into an image-based ones available but hesitate because you do not know photo editing? It would be much easier if you follow the steps of this exercise.
First, you should identify your graphics will be what color, more convenient to adjust the background color and the decoration is homogeneous.
Step 1. Open a background image
You can open an image. Jpg image is available as leaves, grass, or a tree that you like. Or you can use a brush to paint the background as you. Here, I opened a wallpaper available. (You can dowload this form and practice)

Figure 1
Step 2. Thread color wallpaper
Usually there are some nice background color: orange, blue. This is an example of my color.
- Press Ctrl + U
- Adjust color according to the following parameters

Figure 2
Step 3. Next to decorate pictures (take a picture of your family, friends or friends of friends). then Ctrl + U to adjust the color for the background color uniformity

Figure 3I'll call this layer "layer girl"
Step 4. Put on a layer cogai suitable position above the background
- Edit> Free Transform or (Ctrl + T) and then resize the image to fit, not too big and not too small.

Figure 4
Step 5. Adjust Mode cogai shoft light layer to add some definition required on girl photo
- Duplicate cogai: Right cogai Layer> Duplicate Layer (Ctrl + J)
- Right click cogai copy layer> Blending option
In the Layer Style dialog box: shoft light.

Figure 5
Step 6: Ctrl + E to cogai layer and layer blending cogai make a copy.Step 7. Create boder for cogai layer.
- Right click cogai layer> Blending option
- Layer Style dialog: click stroke> set size 4-7 (depending on size small or large image)

Figure 6
Step 8. Fill the mask
- Press Ctrl + click and select layer cogai - You'll see a dotted border around cogai layer.
- Click on the "Create a new layer" in the Layers palette to create a new layer

Figure 7- Use the Brush Tool to fill the new layer mask, here I use the small brush chrysanthemum (Size: 35, Opacity: 50%, front and rear color: # 62ACCB, # ffffff to colors of chrysanthemum similar to the background color)
Figure 8- Start the car a few flowers on the new layer (The brush will definitely display the selected portion)

Figure 9
Step 9.
- Use the eliptical marquee tool, select father from 30-50 depending on the size of the image.
- Select a region just brush layer hoacuc> delete then delete the highlighted area to select the layer pixel cogai

Figure 10
Step 10.
- Ctrl + E hoacuc mixed layer and make a cogai- Ctrl + T to rotate image

Figure 11
Step 11. Decorate around the girl.
- Layer> Layer ... Create a new layer
- Use brush to paint something on the layer you just created (eg Brush Butterfly)
- After the bowl is finished, right click on the new layer you just painted Brush> right click> Blending Options> Drop Shadow
+ Blend mode: Normal
+ Color: color similar to the background color

Figure 12

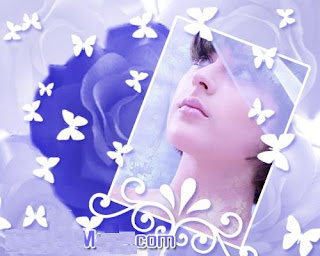
Figure 13By your aesthetic eye, try a few shape tool and add a few lines of text written love to decorate the walls publications.This is my result

Figure 14* This is a different graphic, graphic wallpaper This brush is filled with blue roses.

Figure 15
Subscribe to:
Post Comments (Atom)

No comments:
Post a Comment