Friday, July 26, 2013
Face Painting with Photoshop
Requirements: Photoshop 7 or newer (may work on any version of PS but the tool table will be a little different in the older version)I recommend using drawings, but also work with the mouse. I use both.
And one thing before you start reading: English is not my native language.
1> The first step you need to do is sketch a face that you want to fill. You can draw it on paper ... or like me, are drawn by drawing on the PS. I worked on the drawing page size 2000x3000px, the larger the site the more you draw easy to draw the details. Incidentally, I use this brush to outline the following to his face.

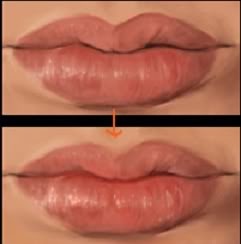
Always pay attention to the balance of your face painted.
.jpg)

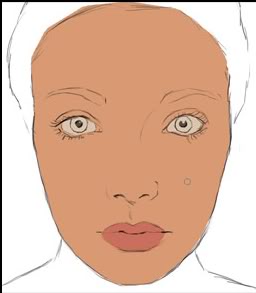
Looking at the picture you see the blue and red lines. The distance between the corners of the mouth and adjacent parts of the same eye (pink line). Or the end of your nose will align straight up on the starting point of the eye (blue line) ... it helps you draw the facial parts in the right distance. That is the basic knowledge you should have when you want to draw a face.
Please rotate your drawing page horizontally (Image> Rotate Canvas> Flip Canvas Horizontal) or mirror the paper you're drawing a few times when you sketch. You do not usually see a few errors of painting as a slightly slanted eyes looked over the other eye, or nose bent ... - the "brain problem", and we can trick the brain by rotate the picture, you will discover the error.
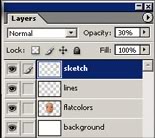
Now you probably already have a layer with the sketch (sketch layer) and a background layer. (If the sketch layer and background layer is a layer in the case where you draw on paper and scan, no problem at all. You double-click on this layer and set the blending mode to mulitply. Then create a new layer, fill it with white for a new layer and a new layer into the background layer).
.jpg)
.jpg)
Now create a new layer between the background layer and layer 2 "sketch". Layer is named "flatcolor" (You will do better if you name the layer, especially when you work with more than 5 layers)
2> Now will start using color. I will use the following basic colors:

Choose Layer flatcolor and fill each region with the color on. I use the Brush Tool (Opacity of Flow and are 100%). However, you can make a selection and colored up with the Paint Bucket tool. Not affect the way you used to do, but it should be somewhat similar to the picture below ;).
.jpg)
Ah, which you can also ready colored eyes and eyebrow color, I'll do it later, no reason at all ^ ^.
.jpg)
Now create a new layer below the layer "sketch". Layer is named "Line". Then adjust the opacity of the layer "sketch" to about 30%
Then go back to Layer "Line". Continue to choose black, select the Brush tool and set as follows
.jpg)

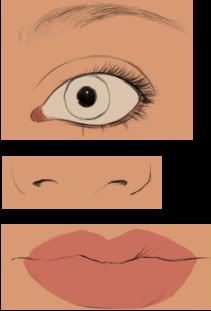
You go to the black line still needed in sketch form, such as the eyebrows, the eyes ... Take a look at the picture below and you will understand what I say, I hope so ^ ^
.jpg)
.jpg)
3> Now the fun begins work. You have to decide which is where the light came. I decided to light will come on the left side, not quite light parallel to the face but almost so. And followed by the 2nd light source somewhere before her face-it creates a light source on the right.
.jpg)

In the above picture I scribbled attempt to describe how the shadows with light source-so maybe it will help you. Many people ask me how to add the highlights and shadows. I can only say that because it's logical, but it's hard to describe in words. Get a desk lamp, sitting in front of a mirror and see shadows on your face like when you move the light and what happens when you add a light source again.Now you can hide layer "sketch" away. Create a new Layer on Layer "flatcolor" Layer name is "lighting", then started working with this layer.4> Select the Brush tool (adjust the opacity to 20, flow 20) and the car started up.
.jpg)
Fill with color coded as A5684C

5> Continue to be the light.
.jpg)

Color-coded F3CFB5
.jpg)
Then Fade with Smudge tool
.jpg)
Results
.jpg)
6> Still a little flat face, need more contrast.

.jpg)
So we need to select the Brush tool and darken the areas that add light to the projector at least. Color is color-coded for 622 918

.jpg)
.jpg)
7> But still ... flat looks like something missing. So to add a little color depth.Create a new layer and name it "RY". Choose this layer, the first red. Fill a red bit on the dark side. You can also use it to fill in the shadows as small as the content. Use red lipstick more depth. Next, will be highlighted in yellow on the light
8> Fade. Now enter 3 layer "flatcolor" to layer "lighting" and layer "RY" (very easy, when you're in Layer "RY" link it with 2 layers "flatcolor" and "lighting" by

and then press Ctrl + E). Layer Naming after entering the "Face".To continue, choose Layer "Line", then use the Smudge tool to make the lines look like no more lines that look like the below image ... lol
.jpg)

9> You can enter 2 layer "Line" and "face" again. We still have a few areas to brighter and darker, especially around the eye area. So select the Burn and Dodge tools and playing with them ^ ^. In addition, the size of the brush, I use as settings in the image below.

With the above setup you will do to increase saturation. Using the Sponge tool (Mode: Desaturate, Flow: 20%) to saturation again.
.jpg)
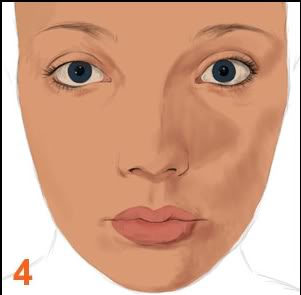
10> If you do all the steps perfectly the first step to the last step 9. But not until we often find places that can be corrected and returned to almost all of the previous steps to get a perfect picture.Therefore, in this step 10, look for errors and correct ^ ^. Do not forget to rotate the picture horizontally. I turned to her left and saw the eyes slightly curved, and the face is flat. I need to add some details in her eyes, the color of the nose is not correct and ... more.Ultimately this is a boring tut, now I'm very lazy. More doodle shoulders. Add a few small spots on his face and a veil on her head. As you can see: P
 Here is a picture that was used to fill Ziz. As one of the tut on the road, but by removing some blue and pink. You can use this picture that this practice
Subscribe to:
Post Comments (Atom)
No comments:
Post a Comment