Monday, July 29, 2013
CREATED LIGHTING WITH PHOTOSHOP
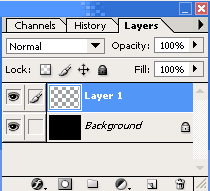
1.) 1 Create a new file - any size - click D then press Alt + Backspace to fill it with black, then create a new layer 1

2.) Maquee eliptical tool tool then drawing circles in Figure 1, then white color and paint it.

3.) Go to Edit> Transform> Distor, then drag the anchor point as :

4.) 1 Create a new layer - then use the Lasso tool to select the drawing 1 as shown.

5.) Select the type of white or color as shown - then click to color it -
then reduce the opacity to 16% size

6.) Press and hold Ctrl - then click once on the layer 1 1 - to create a ring road around the white. Then click on the layer 2 and press Delete

7.) Create a new layer 1 - 1 draw then selected as the picture

8.) Set parameters as shown

9.) Use the gradient tool you select 1 then pull the top down as shown

10.) Go to Filter> Blur> Gaussian Blur. parameters such as the

11.) Pairing adding the lights above you will like this. The self-painted lampshades you okay

Subscribe to:
Post Comments (Atom)
No comments:
Post a Comment